About Me

I started this blog to keep track of my kitchen creations. I love cooking and eating. In 2008 I was diagnosed with RA. Food started becoming a huge problem. I needed to find a better way to eat the flavors I love. All the recipes I create are driven by my desire to eat good food that won't create extra pain and inflammation in my internal ecosystem. While the recipes are wholesome, the language is not. I swear. I use the word 'fuck'. A lot! I make no apologies for that. It's just a fair warning. I'm raw and real. Happy cooking! Even happier eating! Cheers! Angie

Sunday, January 6, 2013

Strawberry Spice

This morning I was chatting with a couple of High School friends on FB.  Dairy Free Diva was mentioned and it inspired me to create something new this morning.
 
I've been arguing profusly with bronchitis for the past week and frankly it's making me miserable.  Forget about the fact that it's cold and snowy.  I looked through the produce in my fridge, feezer, and counter to find something that would give me some "summer comfort".  I have certain summer comfort fruits that I always try to keep in the freezer.  I found 3 and added some ginger.

The fruits are chock full of Vitamin C and fresh ginger is great for knocking out a cold.
 
 
Put in the Vitamix the following:
 
2 whole oranges minus the zest (Use the white pithy part.  It has a lot of good nutrients!)
1/4 of a pineapple, peeled
1 big handful of strawberries
2 inches of ginger, peeled.  You can use more if you like it really spicy!
 
Blend them until smooth.  You may have to add a small amount of water of your fruit is frozen.


Saturday, December 1, 2012

Homemade Kombucha

For this recipe, you will need a kombucha mushroom or scoby and one cup of already brewed kombucha.  You will also need a gallon-sized GLASS jar with a wide opening.  Ball makes one that is not usable for canning but it is perfect for this.  Really, any glass jar with a wide mouth will do as long as it's a gallon in size.

Clean your jar out very good.  If you have a dishwasher, run it through there.  Let it drip dry upside down.

Make a batch of tea (any kind will work) by combining 1 gallon of water and 10-12 tea bags in a kettle on the stove.  Bring to a rolling boil and let it boil for about 10 minutes. 

After 10 minutes, turn the stove off and add 1 cup of sugar.  I recommend some type organic cane sugar.  Stir gently to incorporate the sugar.  Be careful not to break the tea bags!

Let the tea sit until it reaches room temperature.  You can leave the bags in while it cools.

Once the tea is room temperature, take out the tea bags and pour about 3/4 of it into the gallon jar.  Carefully add the scoby and the 1-cup of already prepared Kombucha.  Make sure your hands are super clean before you touch the scoby!  Also make sure that the tea is completely cooled off.  If it is too hot, you will kill the scoby.

Top off the jar with the remaining brewed tea.  Make sure you leave about an inch of space at the top of the jar.

Cover your jar with a towel secured by a rubber band.  DO NOT PUT THE JAR'S LID BACK ON!  The gases from the fermentation process will cause the jar to explode!

Put the jar in a cool dark place, such as your pantry.  Your kombucha and scoby will not do well in sunlight so keep them in the dark!

In 10 days your Kombucha will be ready.  Pour it as you want it.  You can add ice or more sugar to it if you like.  If it's not as fizzy as you would like it, you can pour it off (without the scoby) into quart-sized canning jars, screw on the lid and let it sit a few days for a second fermentation.

Make sure you don't drink it all!  You'll need a cup left over to start another batch.

You will also see another scoby grow.  You can keep it and start a second jar or you can pass it on to a friend!  Just remember that it needs to also have 1 cup of prepared kombucha!

You don't have to use caffeinated tea every time (my first batch was made using Tazo's Passion tea) however, if you are consistently using decaffeinated tea, make sure that every couple of batches you brew it with caffeinated tea. 


Friday, August 17, 2012

Chocolate Pudding with Cashew Creme

I created a go-to chocolate pudding recipe that I love out of one that was recommended to me.  I had to tweak it a little bit to suit me.  I made it very simple with only 3 ingredients.  I've used it in frozen desserts as well.  Just recently I started following Paul Jarvis at Eat Awesome.  His eBook is fantastic and well worth the 5 bucks.  He has a recipe for cashew cream that I tweaked a little bit for this recipe.

Chocolate Pudding
2 avocados
honey (if you are vegan, then you can use agave but realize that it is not raw)
cocoa powder or cacao powder (not both)

Place the avocados in a food processor.  Add 4 tablespoons of cocoa powder and 2 tablespoons of sweetener to the avocado.  Blend well in the food processor.  Taste and add cocoa and/or sweetener until flavor suits you.  This will be different for everyone.  I like mine less sweet and more chocolatey. 

Keep refrigerated.

Cashew Creme
1 cup of raw cashews soaked in water for about 3 hours
Coconut water

Drain cashews and put them in the food processor.  Mix well and slowly add coconut water to thin.  Be careful to add the coconut water very slowly otherwise it will be too thin.

Keep refrigerated.

Grandma T's Pickled Green Tomatoes

This original recipe came from the grandmother of one of my best friends. This is a most delicious treat! You can eat these with bread, crackers, or use them for a topping on pasta. My favorite way is to use them as a topping on shredded raw zucchini.

You'll notice that there are no measurements. It's all going to depend on what you have on hand and what your taste preferences are. My jars are heavy on the garlic and red pepper but I chose not to add herbs.

You will need:
•Ball pint-sized canning jars with a wide mouth
•Green tomatoes
•Sea salt
•White distilled vinegar
•Good quality extra virgin olive oil
•Fresh garlic either crushed or thinly sliced (a lot of it)
•Crushed red pepper flakes
•Fresh herb of your choice from the following-basil, oregano, or parsley. Or you can choose to not use any.

1. Slice HARD GREEN tomatoes very thin.

2. Salt both sides of each piece and put it them in a colander.

3. Put the colander in the sink and put a weight on top of the tomatoes. I used a large kettle of water that fit inside the colander. Let the tomatoes drain over night.

4. The next day put the tomatoes in a GLASS bowl and cover them with white distilled vinegar. Cover the bowl with a plate or a towel. Leave it on the counter for 3 days.

5. On the 3rd day drain the vinegar out of the tomatoes and begin the canning process.

6. Layer in the jar in this order-tomatoes (2-3 slices), 1 tablespoon of olive oil, red pepper flakes, garlic, herb of choice.

7. Continue this layering process until you are about 1/2 to 1 inch from the top of the jar. The last layer needs to be olive oil and it must cover the top of the tomatoes. Add 1 tablespoon at a time do you don't end up with too much.

8. Put the lid on the jar and then the ring. Push down the middle button to force the seal and then screw on the ring tightly. Put the jars in a cupboard until they are ready to eat. Let sit for a couple days before eating. Once you open a jar you must refrigerate it!


You can find this and other great recipes on Allergy Free Alaska!

Sunday, August 12, 2012

Cold-Canned Dill Pickles

We make jars and jars of these every year. They last through the winter and they are super easy to make in large batches.

The recipe is for one quart. We line up about 40 Ball quart-sized jars and use about 16-20 quarts of small picking cucumbers.

You will need Ball wide-mouth quart-sized glass canning jars, Ball lids, and Ball bands. New jars come with lids and bands. You can also buy just the lids or the lid/band combos.

Before you do anything you must sterilize the jars and lids. The jars can be run right through the dishwasher. The lids and rings can be boiled on the stove for about 10 minutes.

In each quart jar add:
1/8 cup of salt
2 tablespoons of mustard seeds
1/2 cup of white distilled vinegar
1-2 large fresh dill flower heads
1/4 of a fresh white onion
1-3 cloves of garlic smashed

Once all that is in the jar, add the cukes. We usually quarter them longways. Put them in the jar neatly longways and cram in as many as you can. If there are super small ones then we leave them whole in their own jar. We also make a couple jars of hamburger slices.

Once the cukes are in the jars, fill them up to just 1/4 inch below the brim of the jar. Put the lid on and then screw on the ring as tight as you can get it. Give the jars a good shake and put them in the fridge upside down. The jars will seal themselves.

Every day for the first week, turn the jars, rotating daily from upside down to right side up.

At the second week, stop turning the jars and let them sit for at least another week before you try them. If they don't taste ready, let them sit for another week.

Make sure you test from the same jar each time so that you aren't opening more jars than necessary.


Friday, August 10, 2012

CHERRIES JUBILEE Succo-Frullato

I was making a Beetrice Potters Rabbit this morning and realized after I juiced the veggies that I didn't have any oranges.  After searching the freezer for someting sweet to add, this is what I got!

1 beet, including tops
1 large carrot
1/4 cup of blueberries
1/2 cup of cherries (pitted)

Juice the beet and carrot.
Put the juice in a blender and add the fruit.
Blend until smooth.

If you keep your fruit frozen, this will make a great smoothie.

Thursday, August 9, 2012

Cashew Milk Ice Cream

This was a last minute thought the other day as I was craving ice cream. I had the cashews already soaking for milk and decided to make ice cream.

You can flavor this also. I put some cacao nibs in mine. You can add raw honey, fruit, other raw nuts. The possibilities are endless!

1 cup of raw cashews
2 cups of water

Soak the cashews in the water for about 3 hours.

Drain and give a quick rinse.

Put the cashews in a high powered blender with 2 cups of fresh water. Blend on medium high for 3 minutes.

Pour into ice cube trays and freeze.

Once frozen, soften at room temperature for a bit then put back into the blender and blend on high again until creamy.

Put into single serving sized containers and refreeze.

Let soften for a bit before eating.


Friday, August 3, 2012

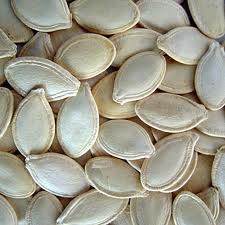
Super Seeds

Thoughts of fall are sneaking into my head here and there.  Don't get me wrong.  I'm enjoying summer a great deal.  All the green, the frogs and toads int he yard, harvesting things from my garden each day, the heat that we've had.  Love it all!  But every now and then something small happens, like, I get a whiff of something or the sky has a certain look to it and thoughts of fall creep into my head.

Fall is my favorite time of year and one of my favorite holidays is Halloween.  I love everything about it, but mostly the creep-out factor!  One snack I look forward to every year are fresh pumpkin seeds.  It's so gratifying for me.  Carving up our pumpkins, digging out the seeds, cleaning them, roasting them very slowly in the oven over several hours.  The smell permeates the whole house! 

I never knew until recently how good pumpkin seeds are for you.  They're LOADED with good stuff!  Rather than try to type it all for you, read all about pumpkin seeds for yourself!


Another one of my favorite treats is sunflower seeds.  Sunflowers are so big and beautiful.  It's like having the sun right in your garden!  I love planting all kinds of sunflowers but the giant sunflowers are my favorite!  The watching and waiting with anticipation for the seeds to be ready to harvest is just as fun for me as watching and waiting for my veggies to grow.  As a kid, I loved David's brand sunflower seeds.  I'd suck all of the salt off the shell before I broke into it to find the tasty treasure hidden inside.  They are still popular with kids today.  I have to remind my students every year that they are not allowed to eat them in the classroom becuase they have the nasty habit of leaving the shells all over the floor.  Like pumpkin seeds, sunflower seeds are chock full of nutrients.  Go ahead and read about sunflower seeds  for yourself!


Monday, July 30, 2012

Fiesta Salad

As I was trying to figure out what to have for dinner tonight, the yummy salad, Tomato Avocado Salad came to mind.  I decided that I wanted it again.  When I went to the garden to get what I needed, I noticed that there was lettuce was ready so I picked some.  The creative juices started flowing!

Make the Tomato Avocado Salad but use the whole avocado
Add in a handful of baby lettuce
Squeeze in the juice of 1/2 a fresh lime or if you like, you can add the whole lime
Mix well and let sit for about 15 minutes


Check out this recipe and a ton of others on Allergy Free Alaska

Sunday, July 29, 2012

Tomato Avocado Salad

I made this great salad today for dinner.  It was just enough for one.  Everything came from my garden except for the avocado.

1/2 Haas avocado diced
1 big handful of cherry tomatoes halved
1-2 cloves of garlic finely diced
12 fresh basil leaves finely chopped
The leaves of 5 stalks of fresh cilantro finely chopped
3 zucchini flowers chopped
3 tablespoons of extra-virgin olive oil
sea salt to taste

Put everything in a bowl and mix together.  Let stand at room temp for about 15 minutes before eating to let all the flavors mingle.  You can refrigerate this but it tastes best at room temp.


Check out this recipe and a ton of others on Allergy Free Alaska